Residential Roof Installation in North Miami: Steps and Building Inspection Requirements
You might notice a damp spot slowly spreading across your living room ceiling after a typical summer afternoon downpour, or perhaps you find gravel-like shingle granules gathering at the base of your downspouts. In North Miami, these small structural warnings often signal that your home is ready for a complete roof upgrade. Navigating a residential roof installation in our coastal environment requires a clear understanding of both physical construction and strict municipal building codes. Working with an experienced roofing contractor ensures your home remains secure, watertight, and fully compliant with local safety standards.
A new roof is a significant protective asset for any South Florida home, defending against intense sun, heavy rain, and seasonal storms. This guide breaks down the precise physical steps of the installation process alongside the mandatory building inspections required by the City of North Miami Building Department.
The Permitting Phase: Before the First Shingle is Removed
Before any physical work begins on your home, a formal permitting process must take place. The City of North Miami requires a building permit for all structural roofing projects, including a total roof replacement. A licensed roofing company must submit detailed engineering plans, product control approvals (often referred to as Miami-Dade Notice of Acceptance or NOA documents), and a signed roofing application package.
These NOA documents are critical because they prove that the materials chosen, whether architectural shingles, metal panels, or concrete tiles, have been rigorously tested to withstand high-velocity hurricane zone (HVHZ) wind speeds. Once the building department reviews and approves these plans, the official permit card is issued and must be posted visibly on the property before any construction equipment arrives.
Step 1: Tear-Off and Decking Inspection
The first physical phase of a professional roof installation is the complete removal of the existing roofing materials. This process, known as the tear-off, exposes the underlying wooden structure of your roof, which is called the roof decking or sheathing.
Once the old shingles, underlayment, and flashing are stripped away, the crew inspects the wooden decking for any signs of rot, water damage, or structural sagging. In our humid climate, hidden moisture can compromise these wooden panels over time. Damaged panels must be cut out and replaced with fresh, code-compliant plywood to establish a strong, stable foundation for the new roofing system.
Step 2: Re-nailing and the Sheathing Inspection
Once the decking is sound, the focus shifts to securing it to the home's trusses according to modern building codes. This is where the first mandatory municipal inspection occurs: the Roof Sheathing Inspection (often called the nailing inspection).
In North Miami, building inspectors must physically verify that the roof sheathing is fastened securely. The inspector will check the spacing of the nails holding the plywood to the trusses. Current High-Velocity Hurricane Zone codes require specific nail spacing, often six inches apart along the edges and six inches apart in the field, using specific ring-shank nails that offer superior uplift resistance during high-wind events. No underlayment can be applied over the wood until the municipal inspector signs off on this step.
If you want it handled correctly the first time, consider professional roof installation in North Miami.
Step 3: Underlayment and Tin-Cap Installation
With the sheathing officially approved, the crew installs the primary water barrier. Traditionally, this involved organic felt paper, but modern high-performance installations utilize synthetic underlayments or self-adhering polymer-modified bitumen membranes (commonly known as ice and water shield or peel-and-stick underlayment).
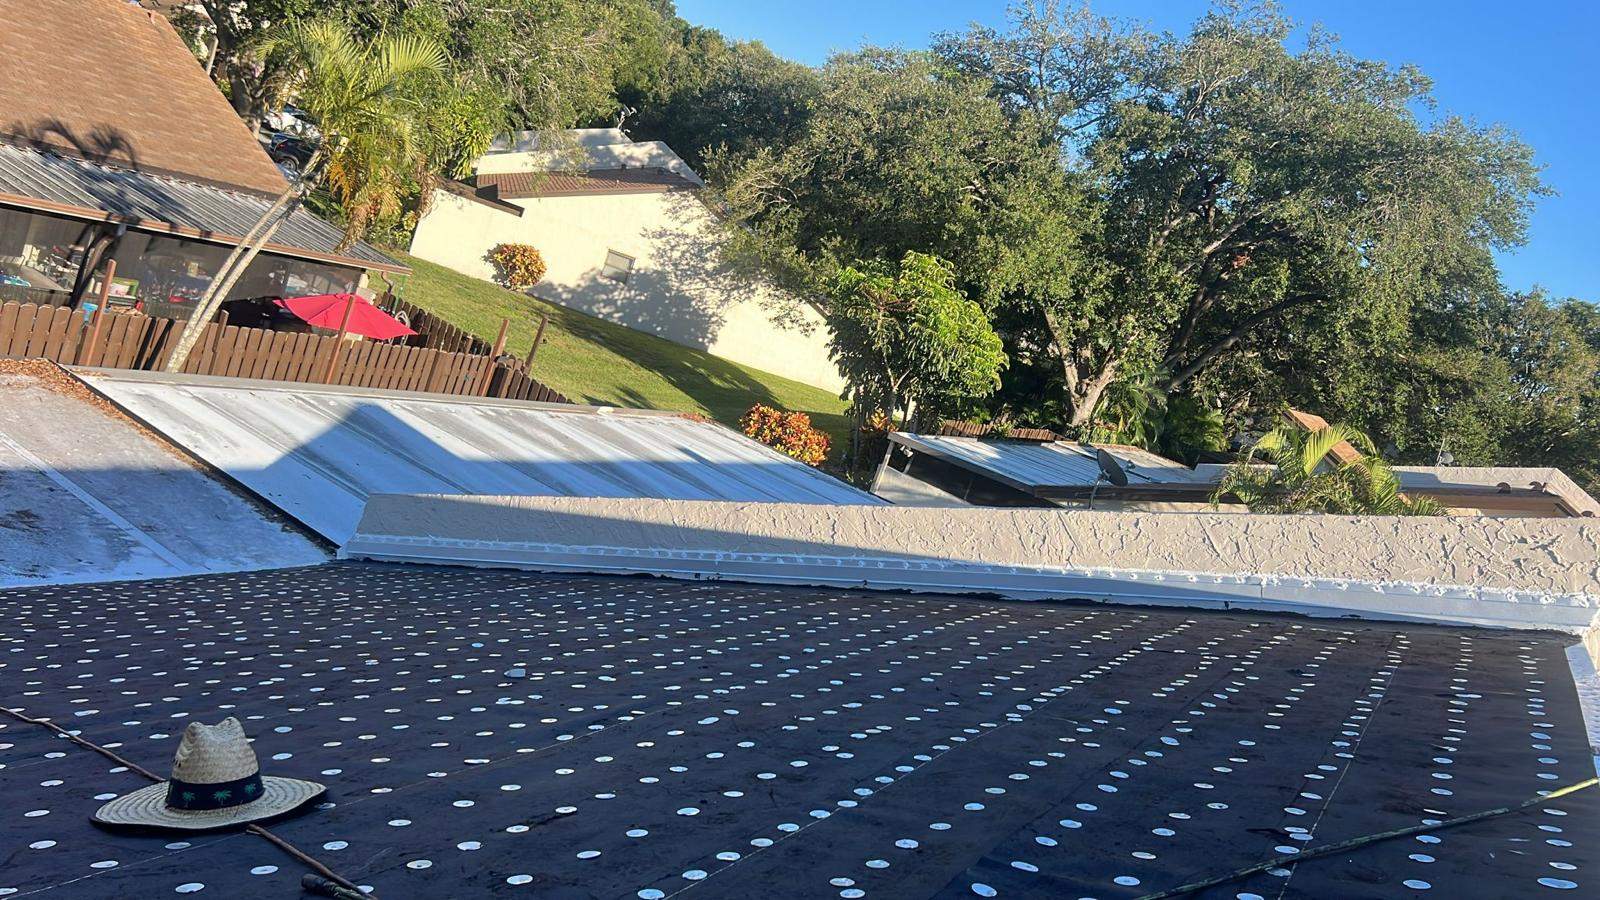
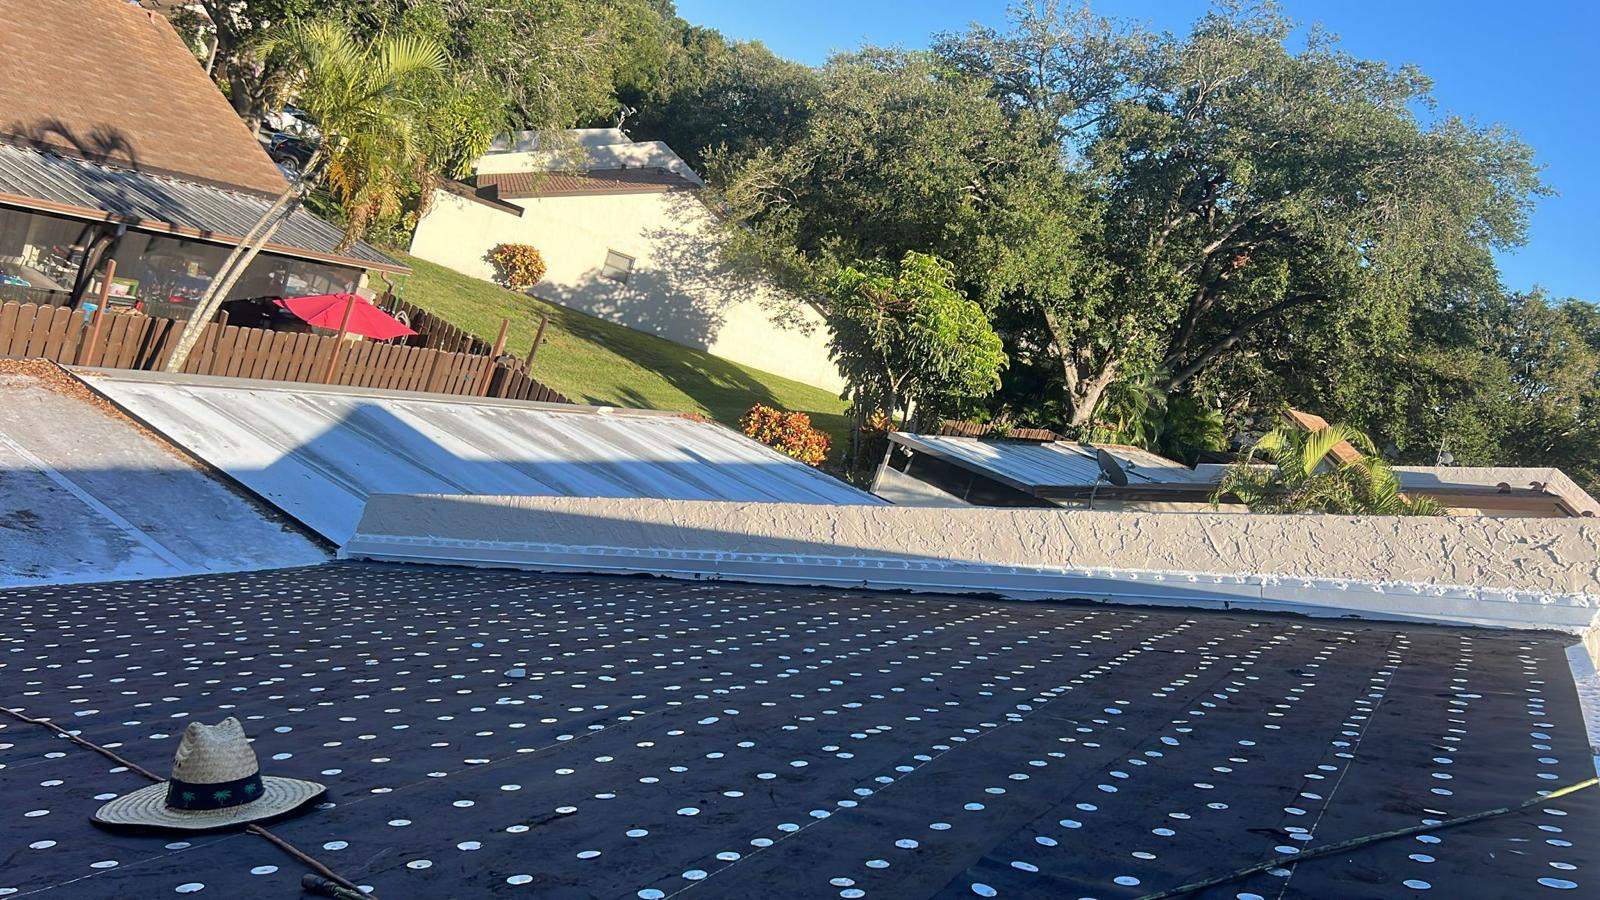
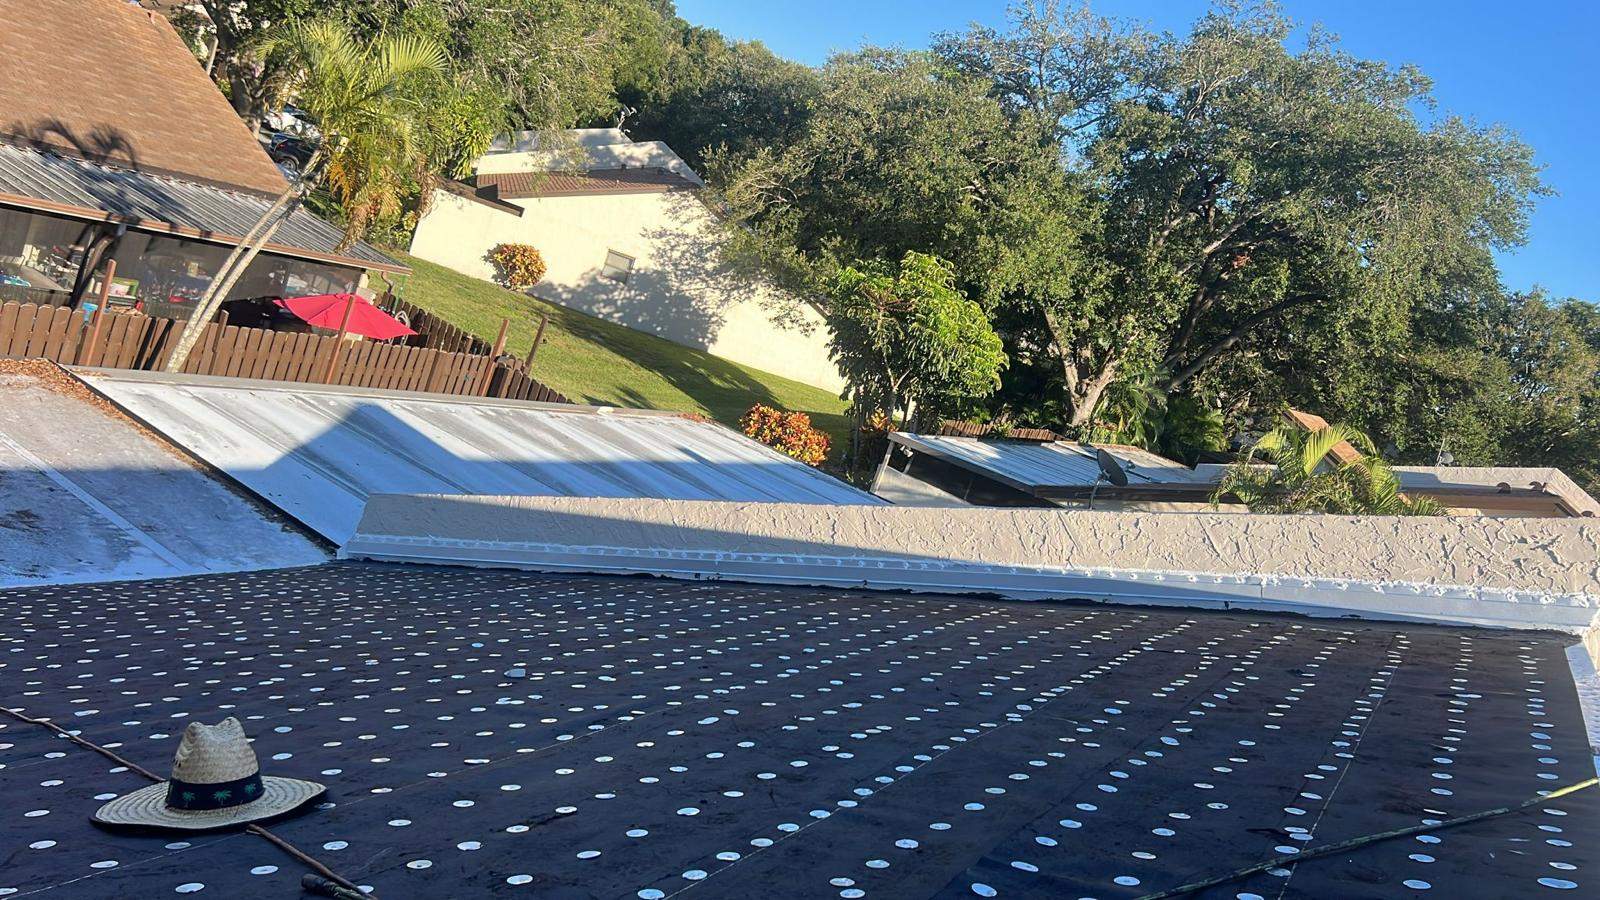
If a mechanical underlayment is used, it is secured to the deck using metal tin-caps and nails spaced in a specific grid pattern to resist wind pressure. This layer acts as the secondary water barrier (SWR). If wind-driven rain ever manages to penetrate your outer shingles or tiles, this underlayment keeps the water from reaching your ceiling.
Step 4: The Tin-Cap and Underlayment Inspection
Before the final aesthetic layer of shingles, metal, or tile is laid down, the City of North Miami requires a second major inspection: the Underlayment and Tin-Cap Inspection.
During this visit, the city inspector climbs onto the roof to examine the underlayment. They verify that the material matches the approved product control documents, that the seams overlap by the required width, and that the tin-caps are fastened in the correct, code-mandated density pattern. This inspection ensures that even if a major storm strips away your shingles, the secondary water barrier is robust enough to keep your home dry.
Step 5: Installing Flashing, Valley Liners, and Drip Edges
Water damage typically starts in the joints and valleys of a roof rather than on flat surfaces. To prevent this, the installation crew integrates metal flashing along critical transitions, such as where the roof meets a wall, chimney, or valley.
A metal drip edge is installed along the perimeter eaves and rakes to direct water away from the fascia boards and into your gutter system. Valleys are lined with heavy-duty metal or thick membrane liners to handle the high volume of runoff water that channels down these intersections during heavy South Florida downpours.
Many North Miami homeowners rely on expert roof installation in North Miami for exactly this.
Step 6: Laying the Final Roof Covering
With all structural inspections passed and the water barriers secured, the crew begins installing the visible roofing material. The physical application steps vary depending on the chosen material:
Asphalt Shingles: Architectural shingles are nailed down using a high-wind fastening pattern, typically requiring six nails per shingle instead of the standard four used in non-coastal regions.
Metal Panels: Standing seam or exposed fastener metal panels are aligned and secured with heavy-duty clips or screws, creating a highly wind-resistant, modern surface.
Clay or Concrete Tiles: Tiles are secured using specialized screws, foam adhesives, or metal clips designed to prevent uplift in hurricane-force winds.
Understanding North Miami's Unique Housing and Climate Demands
North Miami's residential neighborhoods feature a diverse mix of housing stock, from mid-century concrete block ranches near Arch Creek to newer, multi-story residences closer to Biscayne Bay. Many of the older homes in the area were built under historic building codes that did not account for modern wind-uplift calculations. During a roof replacement on an older home, structural retrofitting, such as installing hurricane straps or retrofitting truss-to-wall connections, is frequently required to bring the property up to modern safety standards.
Additionally, our local climate places incredible thermal stress on residential roofing systems. The intense daily UV exposure breaks down lower-quality materials rapidly, while the high humidity can foster micro-climates of moisture along unventilated roof decks. Proper attic ventilation, including ridge vents and soffit intake vents, is essential to allow heat and moisture to escape, preventing premature degradation of your new structural materials.
Comparing Roofing Material Performance in North Miami
Choosing the right material for your roof installation involves balancing lifespan, wind resistance, and thermal performance. The following table highlights the differences between the three most common residential options in our local area:
| Roofing Material | Typical Lifespan in South FL | Wind Resistance Level | Primary Benefit for Local Homes |
|---|---|---|---|
| Architectural Shingles | 15 to 20 Years | High (Up to 110-130 MPH) | Cost-effective and quick to install |
| Metal Roofing (Standing Seam) | 30 to 50 Years | Extreme (Up to 140+ MPH) | Excellent heat reflection and storm durability |
| Concrete or Clay Tiles | 30 to 50+ Years | Extreme (Up to 140+ MPH) | Traditional aesthetic with superior thermal mass |
Step 7: The Final Building Inspection and Permit Closure
Ready for the next step? Learn how roof installation services in North Miami can help and reach out to the team.
The final phase of your installation is the Roof Final Inspection. After the roofing company completes the physical installation, cleans the job site of all debris, and runs a magnetic sweep to collect loose nails, they schedule this final visit with the city.
The municipal inspector conducts a final walkthrough to verify that the entire installation matches the approved plans. They check the ridge vents, attic ventilation caps, valley installations, and overall craftsmanship. Once the inspector signs off on the permit card, the city officially closes the permit. Keeping a copy of this closed permit is highly beneficial, as many Florida homeowners insurance providers require proof of a permitted, professionally installed roof to maintain coverage or apply wind-mitigation premium discounts.
Frequently Asked Questions
How long does a roof installation take in North Miami?
For a standard single-family home, the physical tear-off and installation typically take between two to five days. However, the overall process can take longer depending on weather conditions and the scheduling availability of municipal inspectors for the required sheathing and underlayment inspections.
Do I need to be home for the municipal roof inspections?
Homeowners generally do not need to be present for the sheathing and underlayment inspections, as the inspector only needs ladder access to the exterior roof surface. Your contractor will coordinate these visits directly with the city building department to ensure someone is on-site to assist the inspector.
What is a wind mitigation inspection, and do I need one after a new roof?
A wind mitigation inspection is a specialized assessment of your home's wind-resistant features, including your roof's deck attachment, underlayment type, and nail spacing. Having this inspection completed by a certified inspector immediately after your final municipal inspection can help you secure substantial discounts on your homeowner's insurance policy.
Can a new roof be installed over my old shingles?
No, local building codes in South Florida high-velocity hurricane zones strictly prohibit overlaying a new roof on top of an old one. A complete tear-off down to the bare wooden decking is mandatory to inspect the wood sheathing for structural integrity and ensure proper nail fastening.
Schedule Your Consultation with a Local Specialist
Protecting your home from the unique challenges of the South Florida climate starts with a precise, code-compliant installation. If you are noticing signs of wear on your current system or need guidance on municipal permitting, reach out to a trusted roofing company to inspect your home and discuss your options.
Explore this guide
- In this guideSigns Your North Miami Home Needs a Roof Replacement›
- In this guideHow to Choose a Roofing Contractor in North Miami›
- From the blogEvaluating Roof Quotes: North Miami Roof Installation Cost | PSR Roofing Miami›
- From the blogRoof Repair & Installation After North Miami Hurricanes | PSR Roofing Miami›
- From the blogGutter Installation North Miami: Protect Your Roof & Home | PSR Roofing Miami›
Need help with Roof Inspection?
PSR Roofing is Miami's licensed & insured expert for roof inspection. Free estimates, honest pricing, and 24/7 emergency response.